Pursuing Amigurumi for beginners can often seem like a daunting challenge… but trust us, once you get the basics down, it’s impossible to not get hooked.
(Yes, sorry – that was indeed a crochet pun.)
Broadly speaking, Amigurumi is the Japanese term used to describe dolls created with yarn. More often than not, they are made using crochet methods, although knitting Amigurumi is possible too.
But of course, since we’re ‘Cozy Vibe Crochet’, today’s post will revolve around how to crochet amigurumi for beginners. So, whether you’re a beginner in crochet, amigurumi, or both, you have come to the right place!
Below, we’ll be demystifying all things Amigurumi, with a step by step tutorial on how you can get started with making some of adorable crocheted friends of your own.
First: What is Amigurumi?
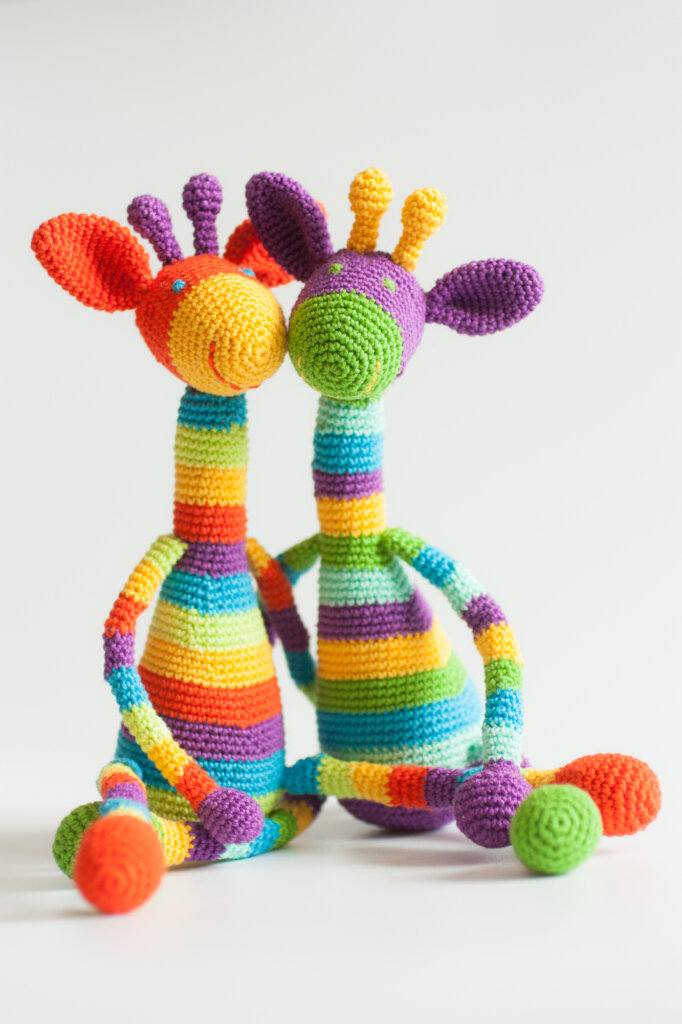
If you’re looking for a more technical explanation, Amigurumi are 3D toys that are made with yarn. In crochet, they are made by crocheting round objects, then stuffing them.
They come in many different shapes and sizes, but in its simplest form, they are generally a ball with ears or other attachments to make them look like the adorable animals or characters you want them to.
Wondering how to make your own Amigurumi friends? Read on.
First: Some Basic Crochet Information
Before you dive into the wonderful world of crocheting Amigurumi dolls, you’ll need to learn some basic crocheting facts and information. Here are some simple must-knows to get you started.
- You can hold the crochet hook in your left or right hand, depending on which is your dominant hand.
- You only need one hook! Crochet is different to knitting and there is only one loop on one hook at a time.
- Different yarns have different weights, which refer to their size. Differently sized hooks correspond to these different weights.
- Tension is a term used to describe the looseness (or tightness) of your crochet.
This is important to note so you don’t end up with something too big or too small. The size of your creation can deviate from the one given in the pattern instruction if your crochet tension is different, so be mindful of this additional factor when you are making your amigurumi doll.
Step One: Gather Your Supplies for Amigurumi
If you are a complete beginner tackling crochet or amigurumi, then you will need to make a few purchases to pursue your amigurumi-making dreams.
Luckily for you, the internet has made it easier than ever these days to get exactly the supplies you need, so here are some essential tools that you will need to start making amigurumi as a beginner:
Crochet Yarn
Of course, yarn is an essential item for amigurumi since it is (quite literally) the building block!
Generally, people use worst weighted yarn or sometimes even finer yarn for crocheting amigurumi.
To make sure the amigurumi remains firm, cotton or acrylic yarn (or a blend) is recommended.
Crochet Hook
Another essential item for amigurumi is of course a crochet hook.
There are many different sizes of crochet hooks, but generally the most common ones used range between 2mm to 10mm. In general, you would use 3-6mm for crocheting amigurumi, depending on your yarn of choice.
As a beginner amigurumi and soon to be crochet master, it’s best value for money to get a full set upfront. Online, there are both ergonomic sets and aluminum sets to choose from. I personally own both models and don’t prefer one over the other. Aluminum ones are colder to hold though!
Crochet Needles
Not to be confused with sewing needles, crochet needles are generally plastic with a much wider needle thread hole. These are key items in crocheting amigurumi, as sewing is important in the final assembly of your amigurumi dolls.
And before you ask, sadly no, your normal sewing needles won’t work for this purpose, because you need a needle that a yarn can fit through!
Crochet Stitch Marker
These are handy little safety pin lookalikes that can mark your stitch for you, which is very useful for crocheting in rounds. You can get them as part of a bundle or on their own, although it’s advisable to get a few, because these little things tend to disappear quickly.
Embroidery Threads
If you plan to add a cute little mouth or nose to your amigurumi doll, you will need embroidery thread.
In a pinch, you could also use black yarn, but embroidery threads are finer (but still thicker than regular threads) which makes it easier to sew precisely but still be visible.
Safety Eyes for Your Amigurumi
Sure, you can sew the eyes of your amigurumi, but it is easier and more conventional to just pop some plastic ones on. You can get a set like this one with different colour safety eyes and even noses for all your needs. Alternatively, sometimes felt is also used and glued on.
Stuffing/Filling
Your amigurumi needs to be 3D (and cuddly) which means it needs stuffing… but for optimal cuddliness, you can’t just put any old materials inside. Proper stuffing is airy, sanitised, and there are several different types on the market… but the simplest trick is you can just use the same filling as pillows. I recommend buying a full bag to use.
Scissors
Lastly, yes, you will need scissors! Luckily, the pair you already own at home will probably do the trick just fine.
Step Two: Learn Basic Beginner Amigurumi Techniques
Now that you have everything you need to crochet amigurumi, it’s time to learn some basics on how to actually do it!
Mastering these basic building blocks of crochet/amigurumi is crucial to your amigurumi journey. Sure, many of these techniques might sound confusing at first, but once you get used to them, you’ll practically be able to crochet new friends in your sleep.
How to Hold the Yarn
Holding a crochet hook is just like holding anything else in life, but the real trick to learn for beginner crocheter is how to hold your yarn.
That’s right, we have a specific way to hold the yarn that makes crocheting easier and faster.
What is the best way to hold your yarn for crocheting amigurumi? With your non-dominant hand, loop the yarn around your little finger and then tuck it under your ring finger and then tuck it back out between your middle and fourth finger, which helps maintain tension of the yarn as you crochet.
Confused? This technique does sound a bit vague when describing with words, so here is a good tutorial I found online:
Basic Stitches and Techniques
The next step to getting started with crochet/amigurumi is learning some basic crochet stitches and techniques. It may seem like a lot to learn at first, but once you nail these basic stitches, you’ll be able to crochet just about anything!
NOTE: It’s important to know that there are two versions of crochet terms: UK and US. The UK term is what I learned with, but as long as you understand the equivalent, you can get by.
Anyways, if you are getting started with Amigurumi, here are the most common stitches and techniques you need to know:
Double Crochet / Single Crochet
It’s most likely that you only have to use UK double crochet (US single crochet) in a tighter row for amigurumi. Here is a video example so you can learn how it’s done:
Magic Circle
Another important term/technique to master for your amigurumi journey is a magic circle. This forms the basic building block for crocheting amigurumi and granny squares.
What is a magic circle exactly? They can be a little difficult to describe with words, so here is a good tutorial on how to make one for yourself:
Slip Stitch
A slip stitch is how you finish off your crochet project, and therefore crucial for completing your amigurumi project. You might need to use a needle to help you tidy up the loose yarn at the end, but here is a video tutorial that will help you understand this important technique:
Step Three: Find Beginner Amigurumi Patterns
Now that you have all your tools, yarn, and know the basics stiches, you need to find a pattern to follow.
There are many free amigurumi patterns on the internet, most of which are provided in written form. This just means that the instruction on how to proceed in each round is written out. There are also patterns that are in drawing form, but I’d avoid those until you understand how to read them properly.
A great place to find free beginner amigurumi patterns is Ravelry, which has long been my go to for crocheting patterns. Pinterest is also great and if you want to have clearer step by step instructions, watching YouTube tutorials may be the best option for beginners.
All that said, if this is your very first time attempting Amigurumi and you want the least stressful way to get started, you can buy a beginner set like this one that shows you how to make some very quick, easy, and adorable amigurumi.
Step Four: Practice Your Amigurumi
Now that you know all the basic techniques and building blocks fro crocheting amigurumi dolls, you just need to practice and keep making cute amigurumi dolls as gifts or decorations. You’ll be a pro in no time!
We Hope You Enjoyed This Tutorial on Amigurumi for Beginners!
Hopefully, with this step by step guide on how to get started with Amigurumi, you’ll be an expert before you know it. Let us know in the comments if you have any questions!